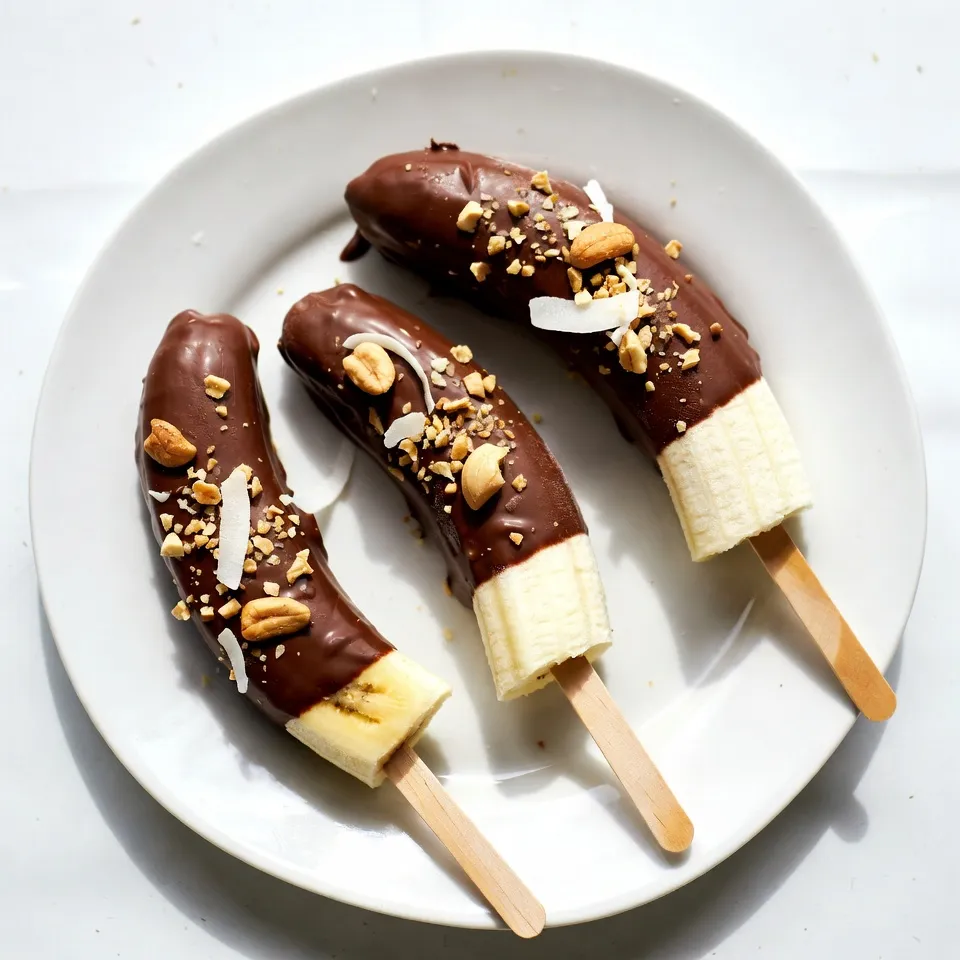
Craving a sweet treat that’s both fun and easy to make? Look no further than chocolate-covered banana pops! These yummy snacks are packed with flavor and perfect for all ages. You’ll love how simple they are to whip up, plus they make a healthy dessert option. Join me as we dive into this delightful recipe, step-by-step, and learn all the tips to make your chocolate-covered banana pops a hit!
Why I Love This Recipe
- Quick and Easy: This recipe is super simple, taking only 15 minutes of prep time, perfect for a last-minute treat.
- Healthy Indulgence: Using bananas as the base, these pops are a healthier alternative to traditional desserts, combining nutrition with indulgence.
- Customizable Toppings: With options like nuts and coconut, you can easily tailor these pops to your taste preferences or dietary needs.
- Fun for All Ages: These Choco-Banana Bliss Pops are a hit with kids and adults alike, making them a perfect treat for parties or family gatherings.
Ingredients
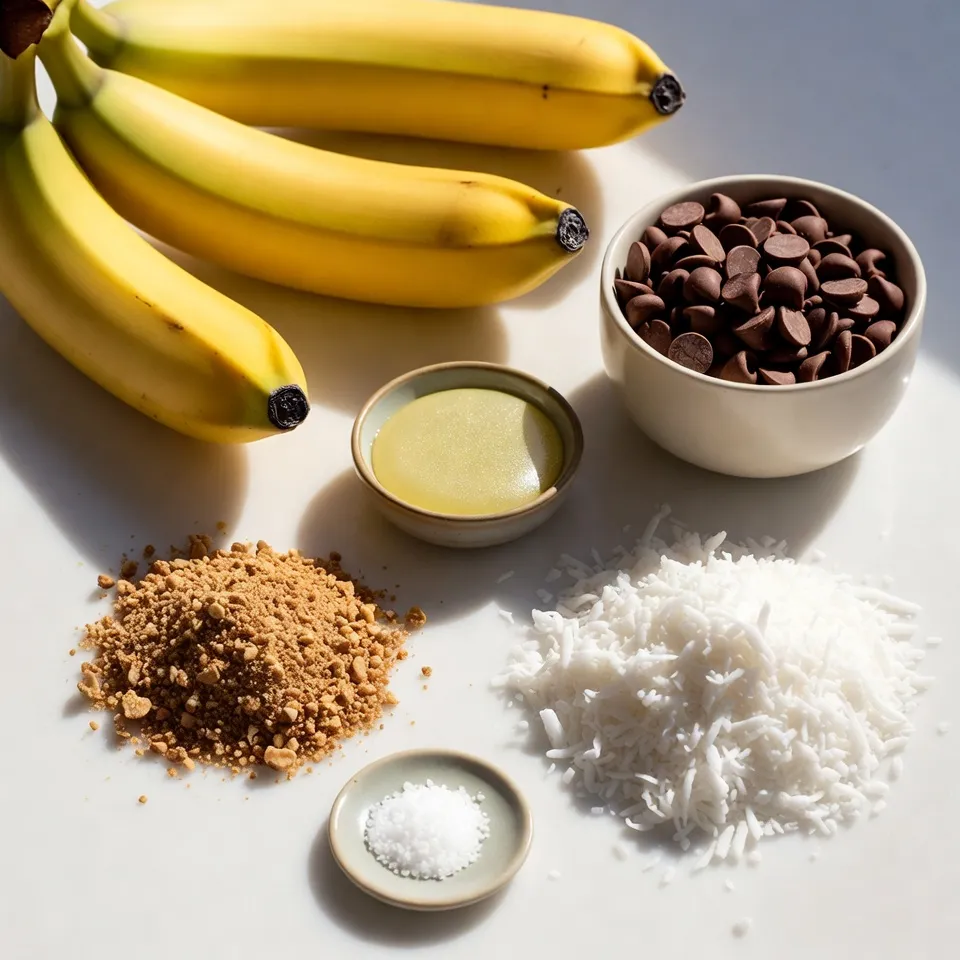
Here is what you need to make chocolate covered banana pops:
– 4 ripe bananas
– 1 cup semi-sweet chocolate chips
– 2 tablespoons coconut oil
– 1/2 cup crushed nuts (e.g., almonds, walnuts, or peanuts)
– 1/2 cup shredded coconut (optional)
– 4 popsicle sticks or wooden skewers
– Sea salt for sprinkling (optional)
These ingredients are simple and easy to find. Ripe bananas give the best flavor and sweetness. Semi-sweet chocolate chips melt nicely, creating a smooth coating. Coconut oil helps the chocolate stay shiny and smooth. You can choose your favorite nuts or skip them if you prefer. Shredded coconut adds a fun texture, but it’s not a must.
Don’t forget the popsicle sticks! They make it easy to hold and eat the pops. A sprinkle of sea salt elevates the flavor, making it sweet and salty. It is fun to mix and match toppings. Use your favorites to create a unique treat!
This list keeps it easy and fun. Gather these ingredients, and you are ready to create a delicious snack!
Step-by-Step Instructions
Preparing the Banana Pops
First, take your ripe bananas. Peel them carefully. Next, cut each banana in half across the middle. You should have four pieces. Now, grab your popsicle sticks. Insert one stick into the cut end of each banana half. This step will make them easy to hold later.
Freezing the Banana Pops
Next, line a baking sheet with parchment paper. This will stop the banana pops from sticking. Place your banana pops on the lined sheet. Make sure they are spaced apart. Now, put the baking sheet in the freezer. Let the pops freeze for about one hour. They should feel firm to the touch.
Melting and Coating
While the bananas freeze, you can melt the chocolate. In a microwave-safe bowl, add the chocolate chips and coconut oil. Heat this mixture in the microwave. Do it in 30-second intervals. Stir in between each interval until it is smooth. Once the bananas are frozen, take them out of the freezer. Dip each banana pop into the melted chocolate. Make sure to coat them well. Let any extra chocolate drip off.
Before the chocolate hardens, sprinkle crushed nuts or shredded coconut on top. If you like, add a pinch of sea salt for a tasty twist. Place the decorated pops back on the baking sheet. Return them to the freezer for about 30 more minutes. Once the chocolate is set, your banana pops are ready to enjoy!
Tips & Tricks
Perfecting the Chocolate Coating
To get a smooth dip, melt your chocolate chips with coconut oil. Use a microwave-safe bowl. Heat in 30-second bursts, stirring each time. This method helps the chocolate stay smooth.
To prevent chocolate from hardening too quickly, work fast. Dip each banana pop while the chocolate is warm. You can also keep the melted chocolate over low heat. This keeps it runny.
Serving Suggestions
For presentation, arrange the pops neatly on a platter. Drizzle leftover melted chocolate over the top. This adds a touch of elegance. You can also sprinkle more crushed nuts or colorful sprinkles for fun.
Try different flavor combinations. Use crushed nuts, shredded coconut, or a sprinkle of sea salt. Each adds a unique taste. You can also dip them in white or dark chocolate for variety.
Health Considerations
Bananas are a great snack. They are high in potassium and vitamins. These nutrients help with muscle function and energy.
For healthier chocolate options, choose dark chocolate. It has less sugar and more antioxidants. You can also look for dairy-free or organic chocolate. These options can make your treat even better!
Pro Tips
- Perfectly Ripe Bananas: Choose bananas that are just ripe with a few brown spots for optimal sweetness and flavor.
- Chocolate Melting Technique: Use a double boiler or microwave in short bursts to prevent burning the chocolate while melting.
- Customization Options: Feel free to experiment with different toppings like mini chocolate chips, dried fruits, or sprinkles for added fun!
- Storage Tips: Store leftover pops in an airtight container in the freezer for up to a week for a quick and satisfying snack.
Variations
Flavor Variations
You can make chocolate covered banana pops even more fun with new flavors. Try adding different toppings like:
– Sprinkles
– Crushed cookies
– Mini marshmallows
– Drizzles of caramel or peanut butter
You can also switch up the chocolate. Use white or dark chocolate for a unique taste. Each type gives a new twist to your banana pops.
Fruit Alternatives
Bananas are great, but many other fruits work well too. Try using:
– Strawberries
– Apples
– Pineapple chunks
These fruits are delicious when dipped in chocolate. If you need a change due to allergies, choose fruits that work for you.
Seasonal Ideas
Make your banana pops festive for holidays or parties. Add seasonal toppings like:
– Red and green sprinkles for Christmas
– Heart-shaped sprinkles for Valentine’s Day
– Pumpkin spice for fall treats
You can also use themed decorations. Use fun colors and shapes to match your event. This makes your treats stand out and adds joy to any gathering.
Storage Info
How to Store Leftover Banana Pops
To keep your banana pops fresh, store them in an airtight container. Place parchment paper between each pop to avoid sticking. This helps keep them nice and neat. They freeze well, so don’t worry if you have extras. Just pop them back in the freezer.
For reheating, I suggest letting them sit out for a few minutes. This way, they soften up a bit. Then, enjoy them as is. There’s no need to reheat chocolate-covered banana pops.
Shelf Life
Banana pops stay good in the freezer for about two months. After that, they may lose taste or texture. Check for signs of spoilage. If the chocolate looks dull or the bananas turn brown, it’s time to toss them. Freshness matters for flavor and enjoyment.
Reusing Leftover Ingredients
Have extra chocolate or toppings? Use that chocolate for drizzling on other snacks! You can coat pretzels or fruit slices. For toppings, sprinkle crushed nuts on yogurt or oatmeal.
If you want other dessert ideas, try making chocolate-covered strawberries or apples. They are fun and easy! You can use the same steps for coating. Enjoy getting creative with your leftovers!
FAQs
What type of chocolate is best for melting?
For melting, I recommend using semi-sweet chocolate chips. They melt well and have a nice taste. You can also use dark chocolate for a richer flavor. If you prefer a sweeter option, choose milk chocolate. Just make sure the chocolate is made for melting. Avoid chocolate bars with extra ingredients, as they may not melt smoothly.
Can I make chocolate covered banana pops ahead of time?
Yes, you can make these banana pops ahead of time. After coating them in chocolate, freeze them for up to two weeks. Just wrap each pop in plastic wrap to prevent freezer burn. You can also prepare the bananas and freeze them in advance. This way, you can dip them in chocolate whenever you want a treat.
How can I make this recipe vegan?
To make this recipe vegan, swap out the semi-sweet chocolate chips for dairy-free chocolate chips. Use coconut oil as the fat, which is already vegan. For the toppings, ensure that the nuts and coconut are free from animal products. This way, you can enjoy a tasty treat without any animal-based ingredients.
You learned how to make tasty banana pops. We covered the easy steps, ingredients, and fun variations. Plus, we shared tips on storage and health benefits. Feel free to get creative with flavors and toppings. These pops can fit any party or snack time. Enjoy making them with friends and family. These treats are not just yummy; they’re fun to make! Happy snackin